Recording With Audacity
Step 1 - Before you start recording
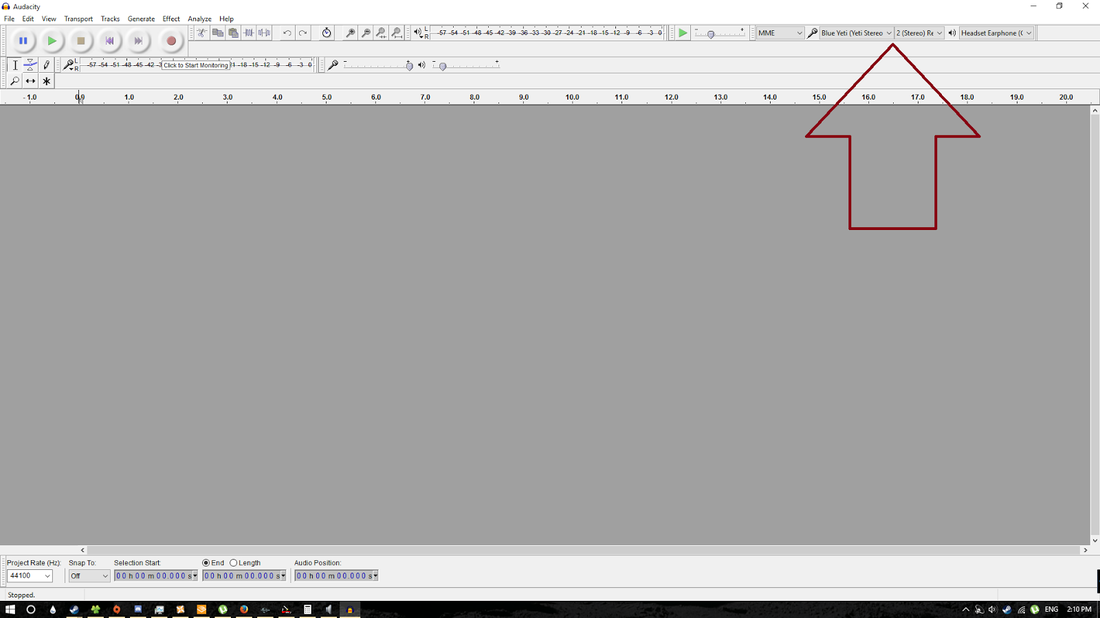
Before you record make sure your microphone is the device being recorded for audacity. To do this simply head to the top right of the application. There you’ll see a microphone icon and a speak icon. The microphone icon indicates what device is being recorded. Warning this may not be your default recording device so make sure it is. The speaker indicates what device the audio will play out of when you listen to the recording.

Step 2 - Change from stereo recording to mono recording
Due to development on Bethesda’s end all of the dialogue in the game needs to be mono so it’ll appear in the game. If it's not mono it won’t appear in the game and we can’t generate lip sync files for the audio
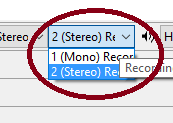
To change this simply go back to the previous mentioned toolbar, click on the drop down bar that say 2 (Stereo). You’ll now have two options, simply select 1 (Mono).
To change this simply go back to the previous mentioned toolbar, click on the drop down bar that say 2 (Stereo). You’ll now have two options, simply select 1 (Mono).

Step 3 - Record Dialogue/Audio
To record the dialogue simply press the red record button as pictured below.
Step 4 - Leaving A Gap
When recording please leave at least two seconds of complete silence (no breathing, clicking the mouse, pressing keys, or anything) at the start and end of your recording track. This moment of silence allows us to isolate any background noise and eliminate it from your recording.
Step 5 - Exporting Your Recording
Exporting your recording is very easy all you need to do is click on File at the top-left dropdown bar, select export audio.
Once you’ve done that you’ll be presented with this screen.
Once you’ve done that you’ll be presented with this screen.
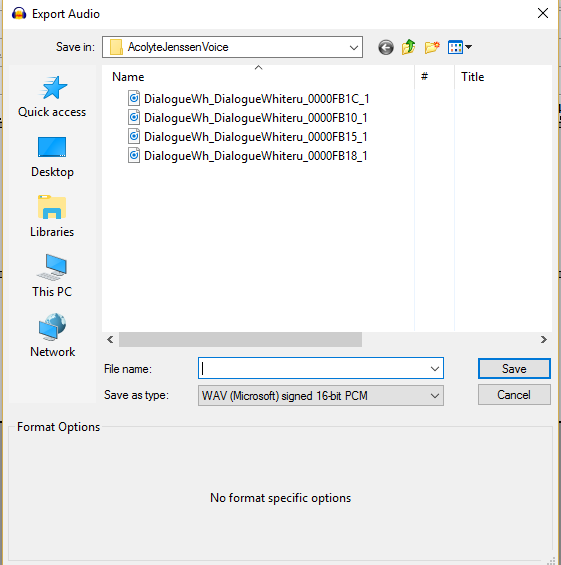
Simply save your line of dialogue with its prewritten code number, e.g PD1 and the name of the NPC. So for example
PD1 - Andurs.
PD1 - Andurs.

It’s very important you save in WAV 16bit format, as you can see I’m saving in WAV 16bit format.
Advanced Production
Although the Team Leaders and their helpers can engineer your raw audio files, if you engineer them yourselves you will save everyone a great deal of work.
By keeping everyone’s recordings within a specific range—not too loud and not too soft—listeners won't have any jarring differences in the volume of one character’s dialogue versus another.
The standard for basic dialogue, to conform with the audio levels we see from the dialogue in Skyrim generally, are as follows:
All of these goals can be accomplished in Audacity with most source material as long as it is of at least minimal initial quality, i.e. you are not attempting to record inside a wind tunnel, in an apartment or flat on a busy city street with constant loud noise coming in, you speak at a normal volume into the microphone, etc.
We’ll be using a short audio clip recorded by team member Druundev to learn how to meet these standards. Please download it here.
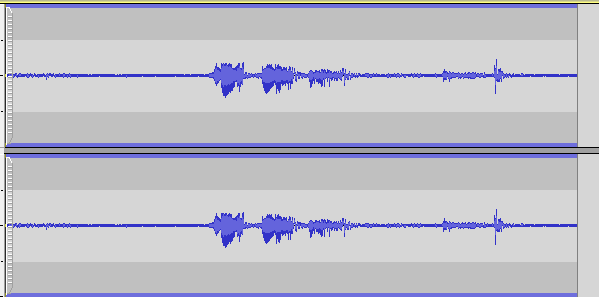
Once you have downloaded it you can import it into Audacity by going to File → Import Audio and selecting it. The file will load and Audacity should appear like this:
By keeping everyone’s recordings within a specific range—not too loud and not too soft—listeners won't have any jarring differences in the volume of one character’s dialogue versus another.
The standard for basic dialogue, to conform with the audio levels we see from the dialogue in Skyrim generally, are as follows:
- Measure between -22 and -26dB RMS (Root Mean Square, the average loudness)
- Have peak values of -5dB (no part of the recording is any louder than -5dB)
- Have a noise floor no higher than -60dB (any background noise is essentially inaudible)
All of these goals can be accomplished in Audacity with most source material as long as it is of at least minimal initial quality, i.e. you are not attempting to record inside a wind tunnel, in an apartment or flat on a busy city street with constant loud noise coming in, you speak at a normal volume into the microphone, etc.
We’ll be using a short audio clip recorded by team member Druundev to learn how to meet these standards. Please download it here.
Once you have downloaded it you can import it into Audacity by going to File → Import Audio and selecting it. The file will load and Audacity should appear like this:
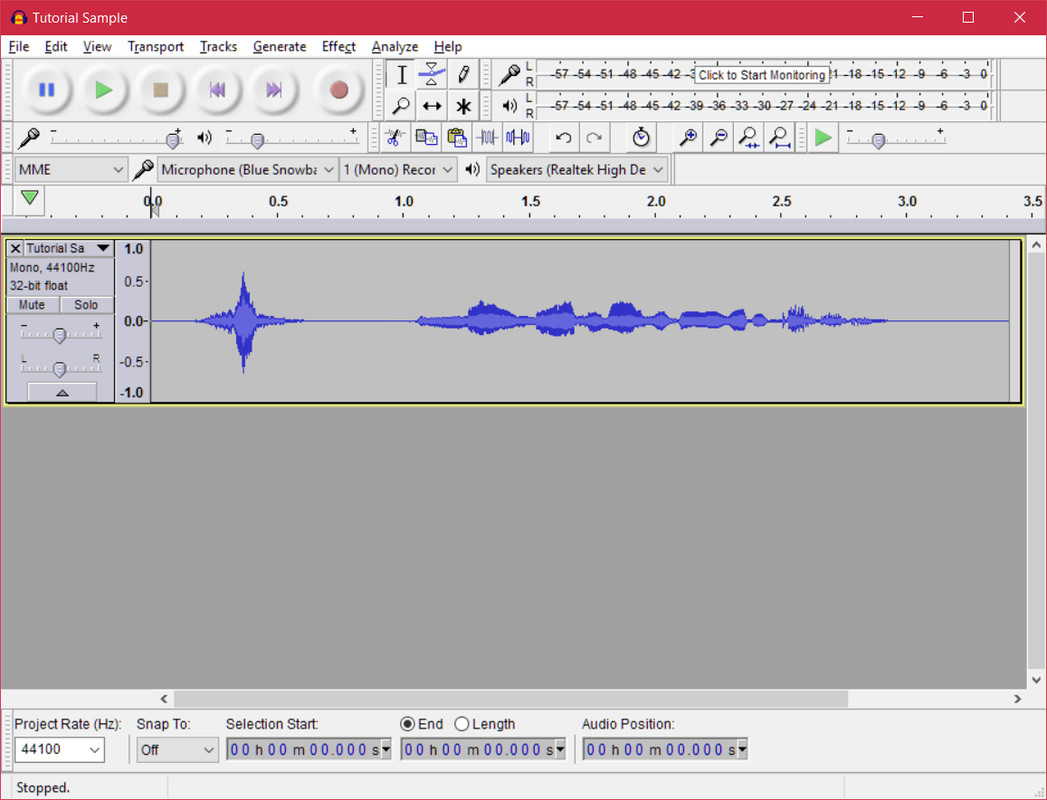
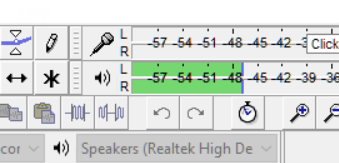
Press Play to listen to the file. You can hear some background noise behind the recording. This is known as room tone. This file doesn’t have a lot of blank room tone at the beginning or end, but thankfully, it is a small enough file overall that we only need a fraction of a second. In this file, the best piece of room tone is at the end, between 3.1 and 3.4 seconds—there is nothing but the room’s background noise present there. Highlight that section with the mouse, and press play. If you look at the monitor while it’s playing, you’ll see that the room tone is about -48dB, which is 12dB higher than the required maximum noise floor.
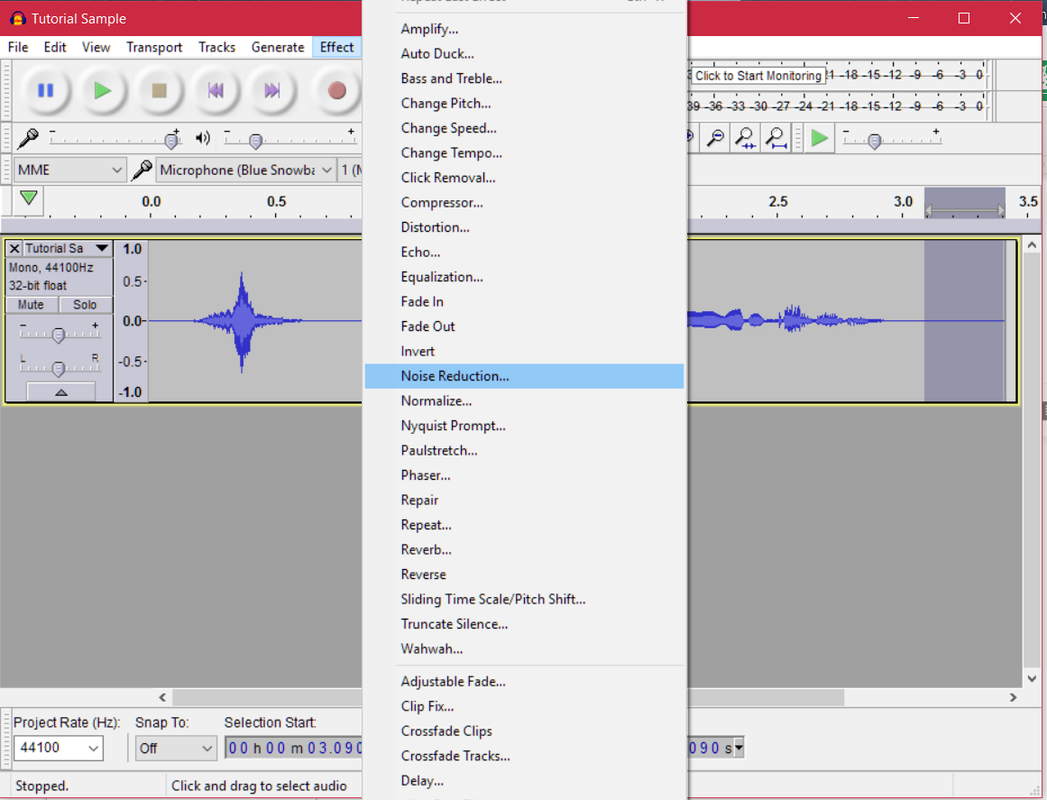
To fix this, click on Effect → Noise Reduction:
You’ll be presented with the following dialogue box:
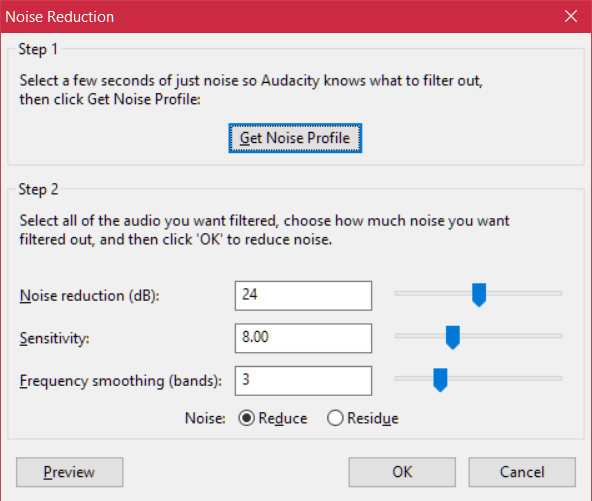
Change the parameters to match those shown, and then click Get Noise Profile. You’ve now told Audacity what the recording’s background noise sounds like.
Next, press Control-A in order to select the entire file, or navigate to Edit → Select → All with your mouse. Go back to Effect → Noise Reduction and this time, simply click OK. Not much will have changed visually, but listen to the audio again. You’ll notice that the noise is completely gone without any noticeable effect on the quality of our talented actress’s voice!
Now we need to check the loudness of the file. If it is too loud or too soft, it will sound jarring compared to the rest of the dialogue in the game. We do this by clicking on Analyze → Contrast. The following dialogue box appears:
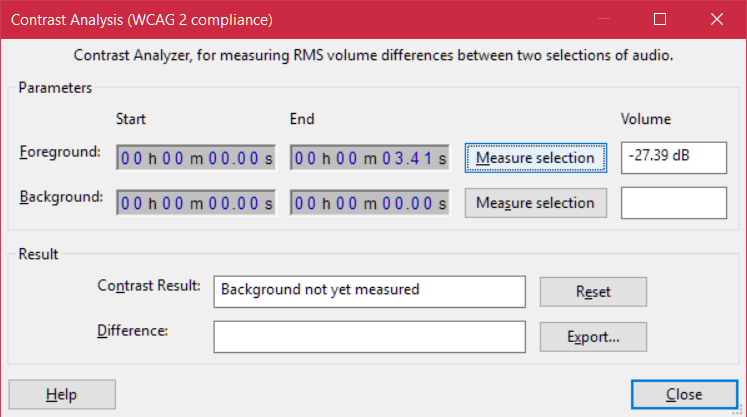
There is already a value next to the first “Measure selection” box because I have clicked it--you should do the same. If you did the noise reduction correctly, your value should be very close to the one shown above (if the noise reduction didn’t take, the value will be close to -27 exactly). From our guidelines above, we know that we need to get our RMS, or average loudness, between -22 and -26dB, so -27.39dB is a little too quiet.
We also need to check the peak level of the sound to see if it’s too loud. Being careful to ensure that the whole audio file is still selected, go to Effect → Amplify and we’ll see the following values (or something very close) defaulted to the dialogue box:
We also need to check the peak level of the sound to see if it’s too loud. Being careful to ensure that the whole audio file is still selected, go to Effect → Amplify and we’ll see the following values (or something very close) defaulted to the dialogue box:
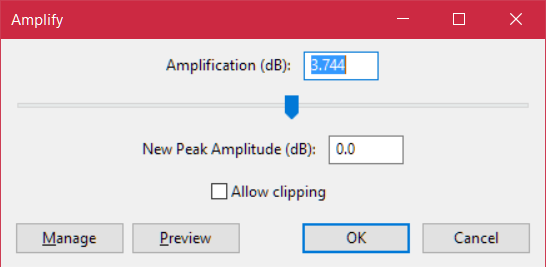
With a little quick math we see that if we were to amplify the audio by 3.744dB, our peak would equal 0. That means our current peak is -3.744dB. But that’s too high. We want it to be -5dB or less.
We can fix both of these problems by limiting the audio.
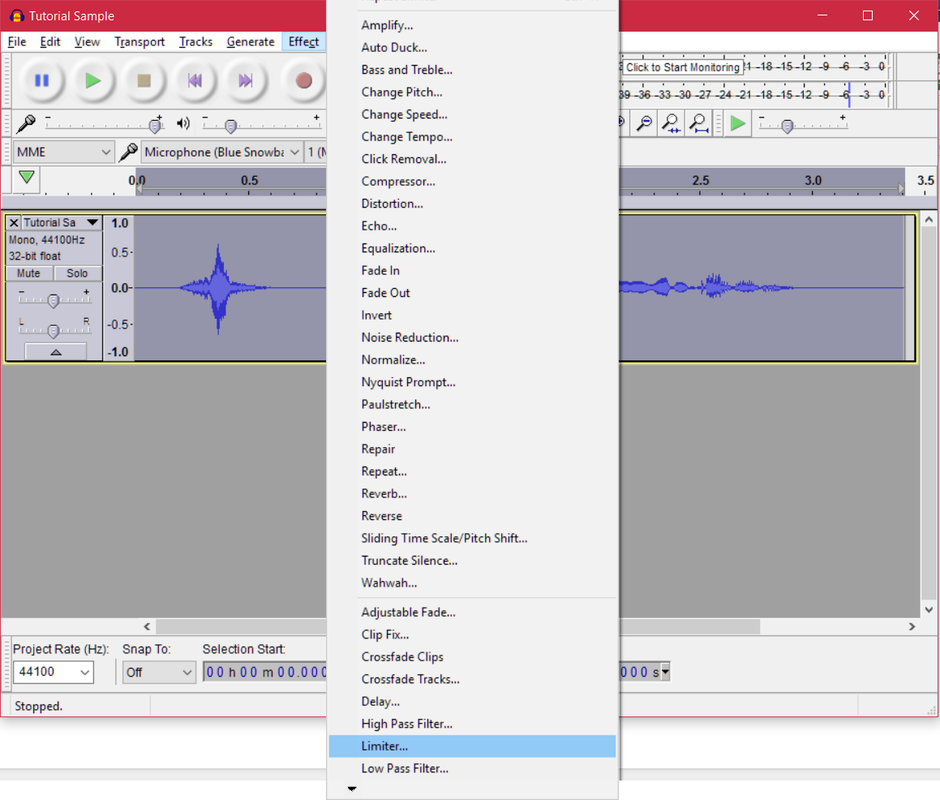
Close the dialogue box and while making sure you still have the whole audio file selected, go to Effect → Limiter, all the way at the bottom:
We can fix both of these problems by limiting the audio.
Close the dialogue box and while making sure you still have the whole audio file selected, go to Effect → Limiter, all the way at the bottom:
. . . and you’ll see the following dialogue box:
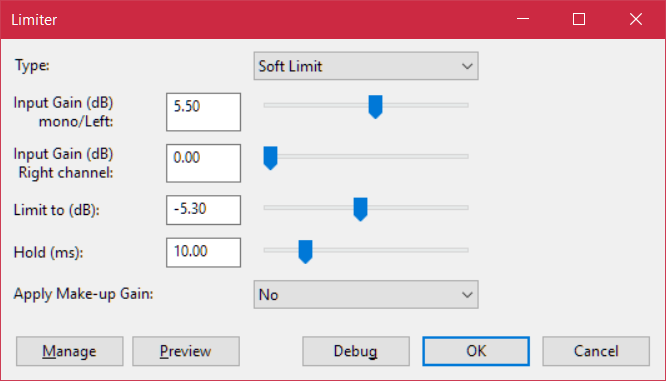
The values in the boxes are not the defaults, so input them. They are ideal for this piece of audio. Why?
Well we know that the sample is a little bit too quiet, so we’re adding 5.5dB of input gain. This will increase the overall loudness. We also know that we need to limit the peak gain to -5dB, so we’ve used a limit that is just below that, -5.3dB. We’ve set the “apply make-up gain” setting to “No” because we’re manually adding gain ourselves. Then click OK to apply the changes.
Sometimes, you might find you have to experiment with how much gain to add to a clip, if any. If you find that you’ve made the wrong decision, you can reverse your change easily by simply going to Edit → Undo with your mouse (or by pressing Control-Z).
Let’s check to see if we got everything square. First, when we go back to Analyze → Contrast, we should find an RMS of just above -24dB. Perfect! We need to be between -22 and -26. Then, if we go to Effect → Amplify, we’ll see that the program defaults to increasing the loudness by 5.3dB, meaning the peak loudness is -5.3dB just as we chose in the Limiter. Since that’s less than -5dB, we’re good there, too.
Listen again to the sound of success! We now have a clip that meets the professional standards required for this project. You can now export the clip to 16-bit WAV as described above.
Written by Charles & Justin Z
Creative Commons
Creative Commons
