Replacing/Adding New Dialogue Audio In The Creation Kit
Only start this tutorial if you have completed either:
Editing & Accessing Scene Dialogue In The Creation Kit
Editing & Accessing Town/Region/Individual NPC Dialogue In The Creation Kit
(TO BE ADDED)
Accessing All NPC/Character Dialogue In The Creation Kit
(TO BE ADDED)
Editing & Accessing Scene Dialogue In The Creation Kit
Editing & Accessing Town/Region/Individual NPC Dialogue In The Creation Kit
(TO BE ADDED)
Accessing All NPC/Character Dialogue In The Creation Kit
(TO BE ADDED)
Please Note This Tutorial Begins From The End Of The Above Mentioned Tutorials
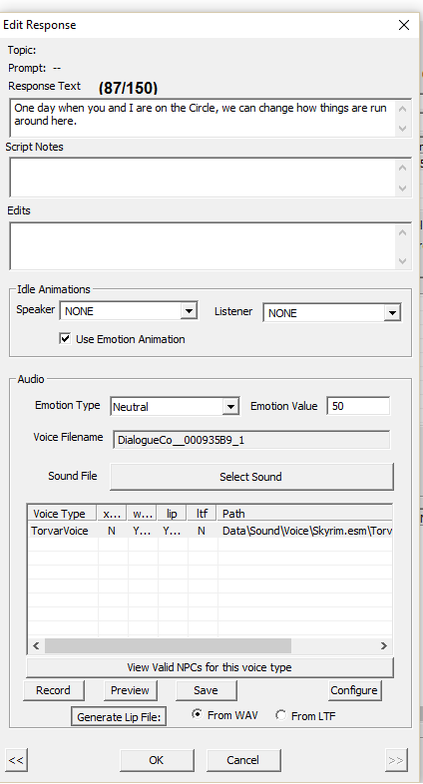
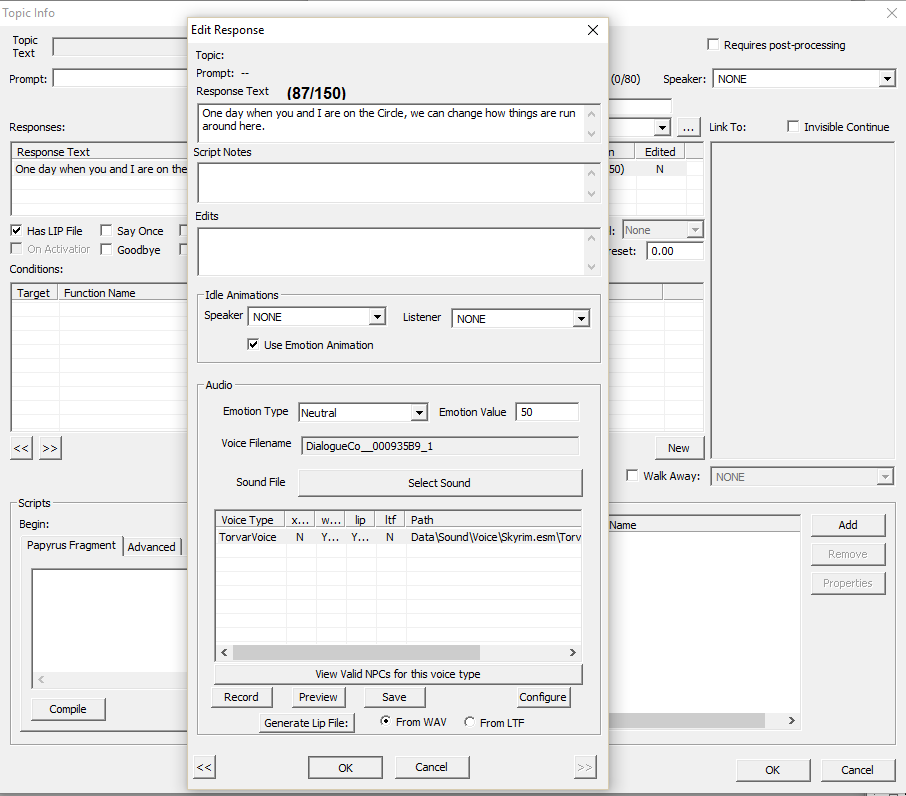
Step 1 - Understanding The Edit Response Dialogue Box/Menu

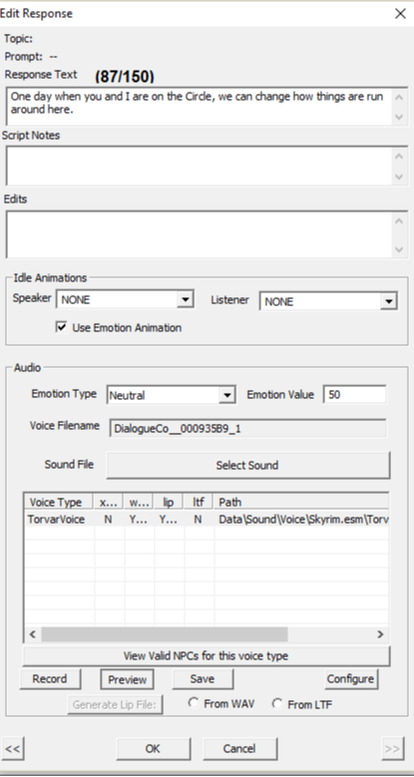
Here you should note five things.
1. The Response Text. This is the text version of the audio and what will appear in subtitles. You want this to match the dialogue recorded in the audio so if there's any alteration in the audio recording make sure this matches.
2. The Voice Filename. This is the name of the voice file that the creation kit will recognize. So you will have to rename the appropriate file e.g OD4 - Torvar to DialogueCo_00093589_1 for the Creation Kit to register the audio.
3. The Voice Type/Audio file box. This box contains the information as well as the path for this specific audio. Some pieces of dialogue will have multiple audio files so there'll be more than one of these. In this there's only one which you can see highlighted in blue.
4. The Record, Preview & Save Buttons. The Creation kit has an inengine recorder however its pretty terrible and shouldn't be used BUT we do have to use this to create a 'Dummy' audio file.
5. Generate Lip File Button. This button generates lip files based off of the audio file being used for this piece of dialogue.
Step 2 - Recording A Dummy File
Due to the many limitations and inconsistencies of the Creation Kit you can't simply rename your file to the appropriate file name and dump it in the correct path. You have to record a dummy file. A dummy file is just a recording that we'll overwrite with the proper audio recording. This is required as it'll generate the path, folder and register the previously mentioned path & folder with the Creation Kit. However once again we'll have to overwrite this dummy file with the actual recording as the Creation Kit will not recognize it otherwise.
To do this simply press the record button as seen below.
To do this simply press the record button as seen below.
If you are creating a new line of dialogue there will be no text under voice type. So don't stress because all you need to do is to press record, there's nothing to highlight just press record and continue the tutorial.
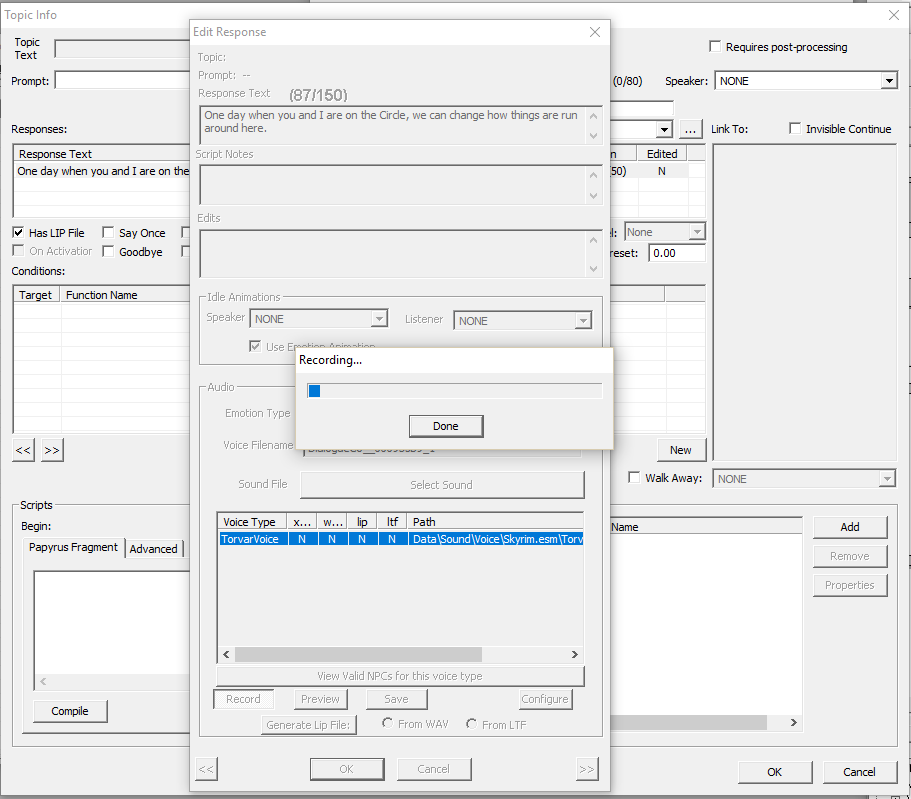
Click done as soon as you see the dialogue box.
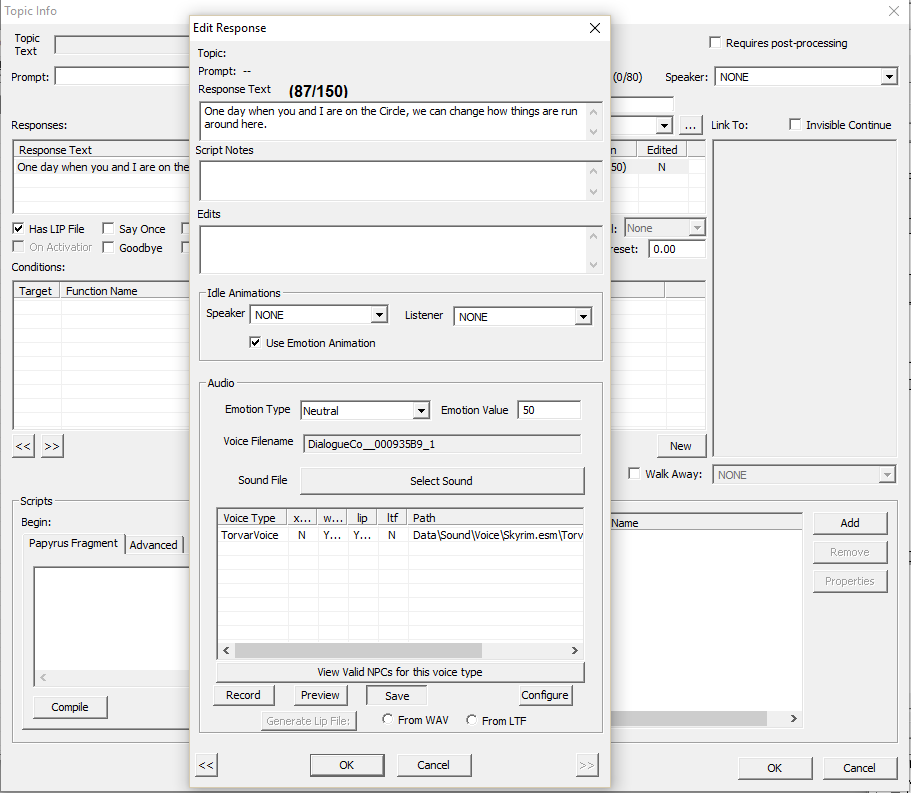
Now we need to save the file so the Creation Kit registers the path, audio and location. Simply press the save button as seen below.
If you're adding new dialogue you'll now see text under 'voice type'.
Now we need to save the file so the Creation Kit registers the path, audio and location. Simply press the save button as seen below.
If you're adding new dialogue you'll now see text under 'voice type'.
Step 3 - Finding The Dummy File
The Dummy file will automatically go to its newly created folder. This folder will either be under the umbrella of Skyrim.esm (folder) if you're editing and not adding dialogue. Or the name of the ESP you're editing e.g VariedVoicesSkyrim Version 0.05.esp if you're adding new dialogue not editing vanilla dialogue.
So as we're editing vanilla dialogue it'll go to this path
So as we're editing vanilla dialogue it'll go to this path

Please note as Skyrim is installed on my A drive it'll be A/Games/Steam/Etc. For most PC's it'll be C/Games/Steam/Etc. For PC's with multiple HDD's it'll depend on where you installed Skyrim.
Step 4 - Overwriting The Dummy File
To overwrite the Dummy file its as simple as renaming the audio file you want to replace it with to its name. The easiest way to do this is to edit the name of the Dummy file as pictured below and Ctrl + C (copy) the name.
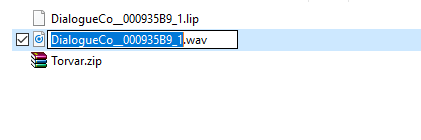
Now we just rename the file of the audio we want to replace the Dummy File with. In this situation I prefer to extract the audio files to the folder before the Dummy File folder so that I can simply drag the files into the Dummy File folder to replace.
Step 5 - Making Sure The Audio Replacement Worked
This step is relatively simple. Simply go back to the Creation Kit and press the preview button. If you hear the audio of your recording then you're golden. If not go back to Step 2 and repeat the steps.
Step 6 - Generate The Lip Sync File & Save
You're almost done! All you need to do now is to generate a Lip Sync file. This is without a doubt the easiest step in this tutorial. Simply click on the audio file path as seen in the image above then click on the circular 'wave' button and the Generate Lip File will automatically ungrey out. Click on the Generate Lip File button and it'll automatically replace the Dummy Lip File. As simple as that.
Now all you need to do is save. To do this simply press OK to the first dialogue box (as seen above. OK to the dialogue box after that (as seen below), the dialogue after that and then you just press the save icon in the top left of the Creation Kit.
Written By Charles
